Manual Coning Tool Operations
- Work out your tube length remembering to add on cone allowance and a little extra to get a clean face. Cut tube to required length, use a hacksaw and tube vice to ensure a square cut. Don’t forget to allow extra length for proper engagement into the connection. Once cut de-burr tubing with ream and/or a file.
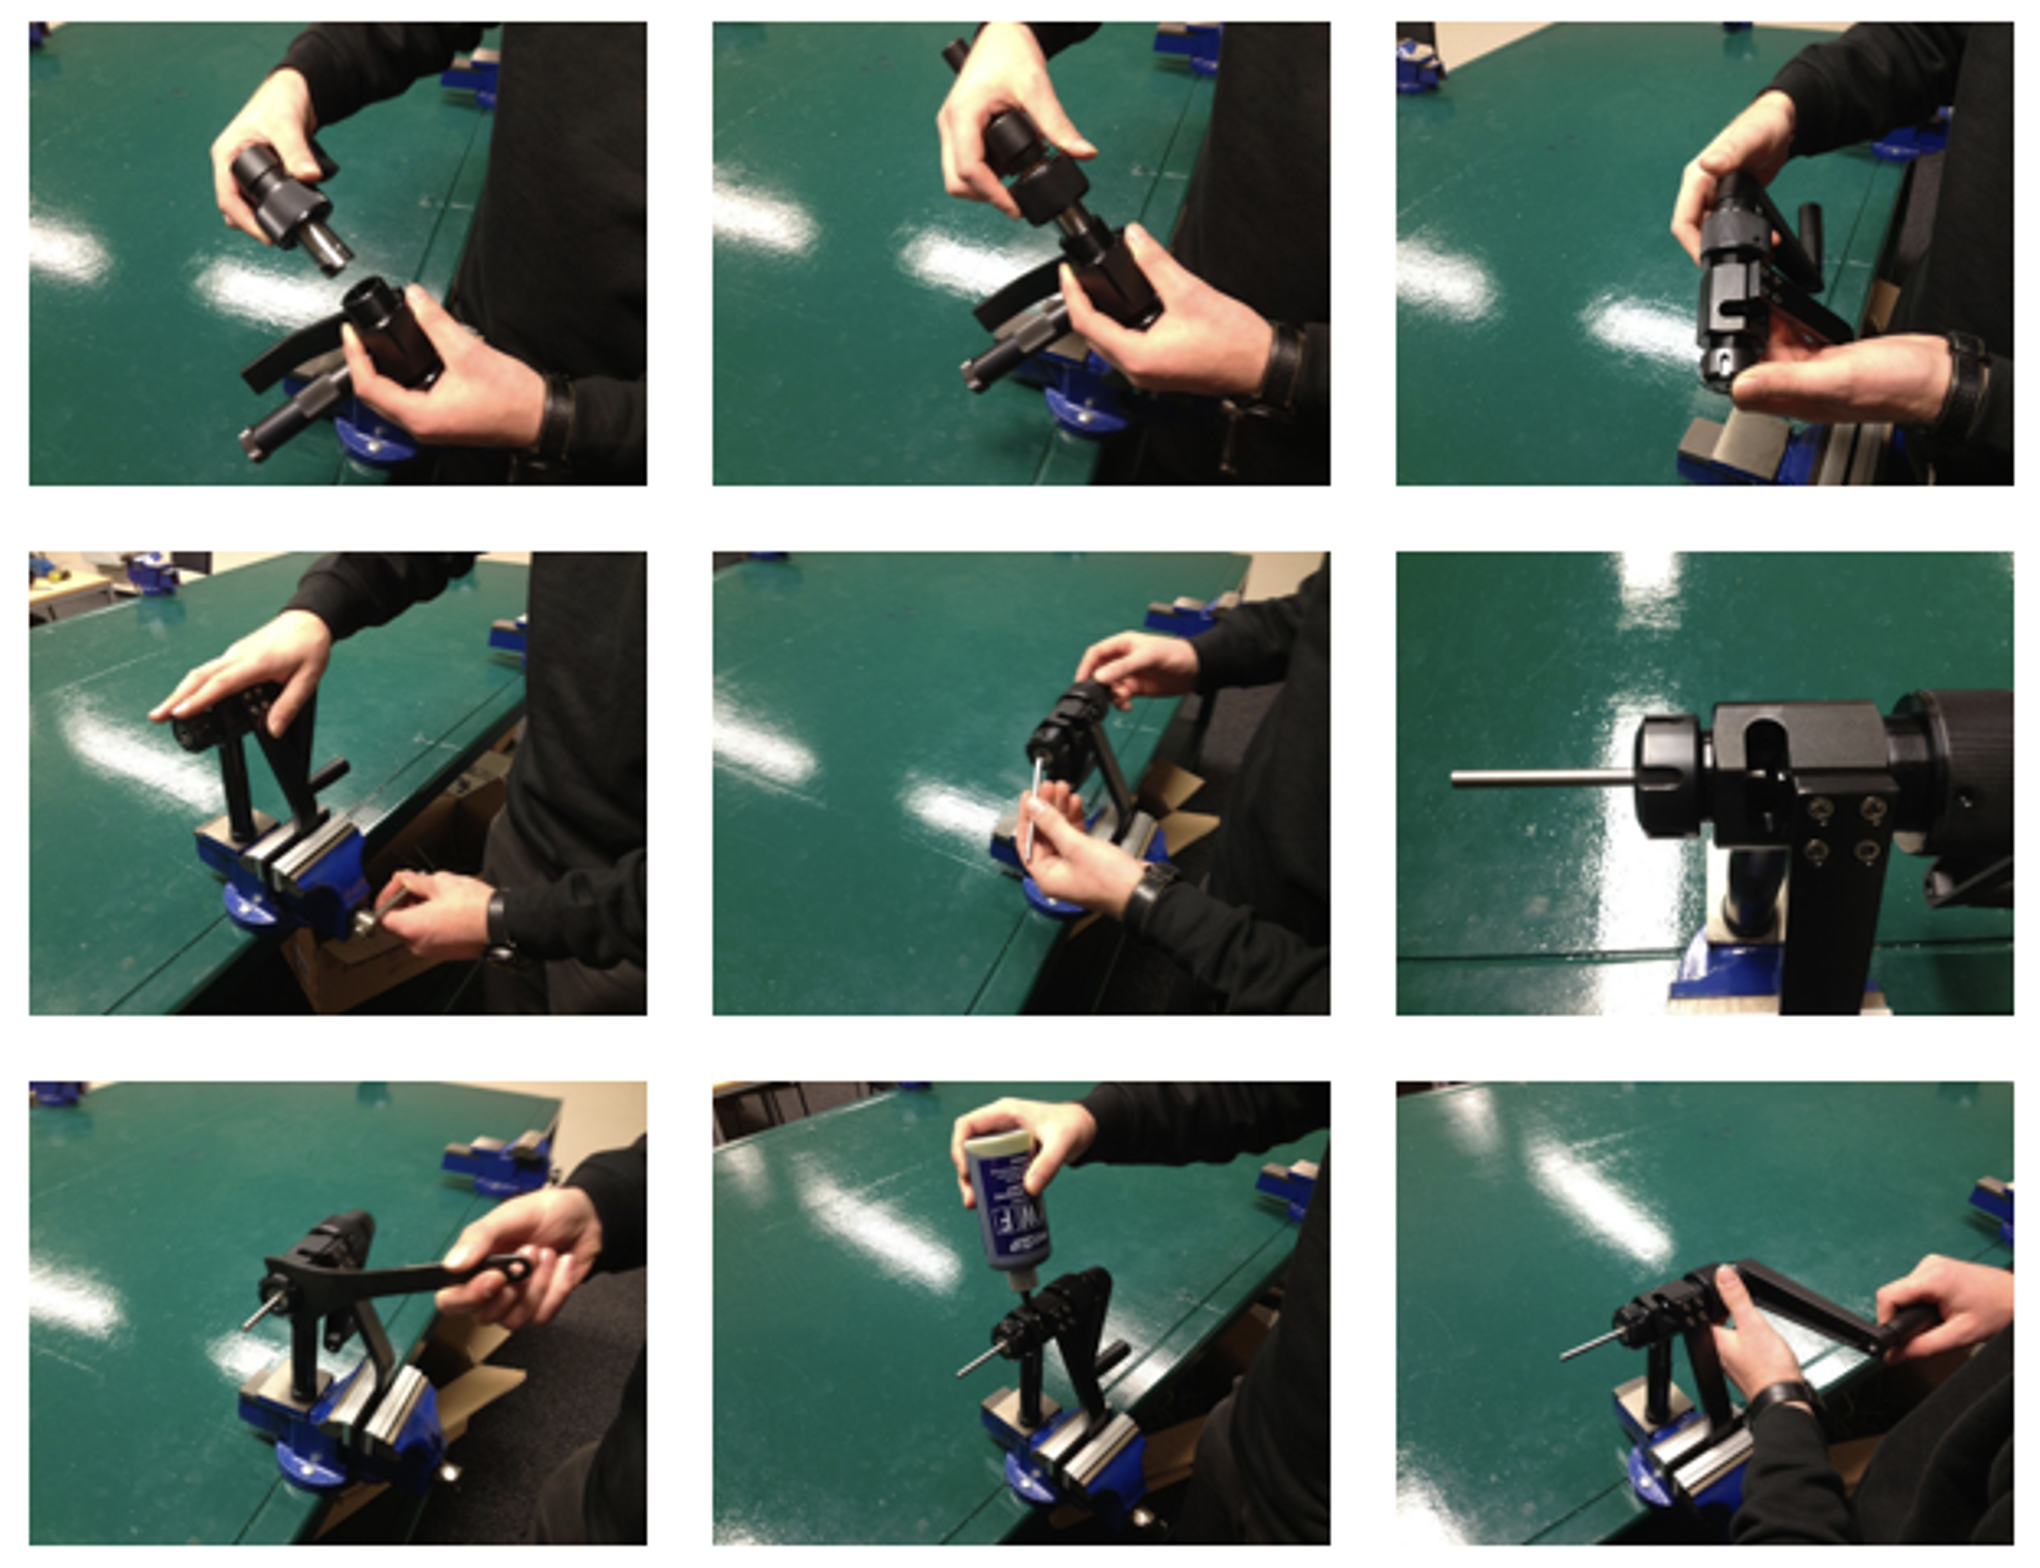
- Install the correct size collet (tube OD) and collet nut into the coning tool housing.
- Place the tool housing or optional support arm in a vice, do not attach the feed nut/ cutter support assembly at this point. Only use a vice with soft jaws and make sure it is positioned so you can pour lubricant in, to allow a flow of lubricant to the cutters and cone.
- Set the tubing so the end of the tube appears in the coning tool housing window. Use the edge of the window as a guide and line the end of the tube with the edge of the window and tighten the collet firmly using the correct wrench to fit the tool.
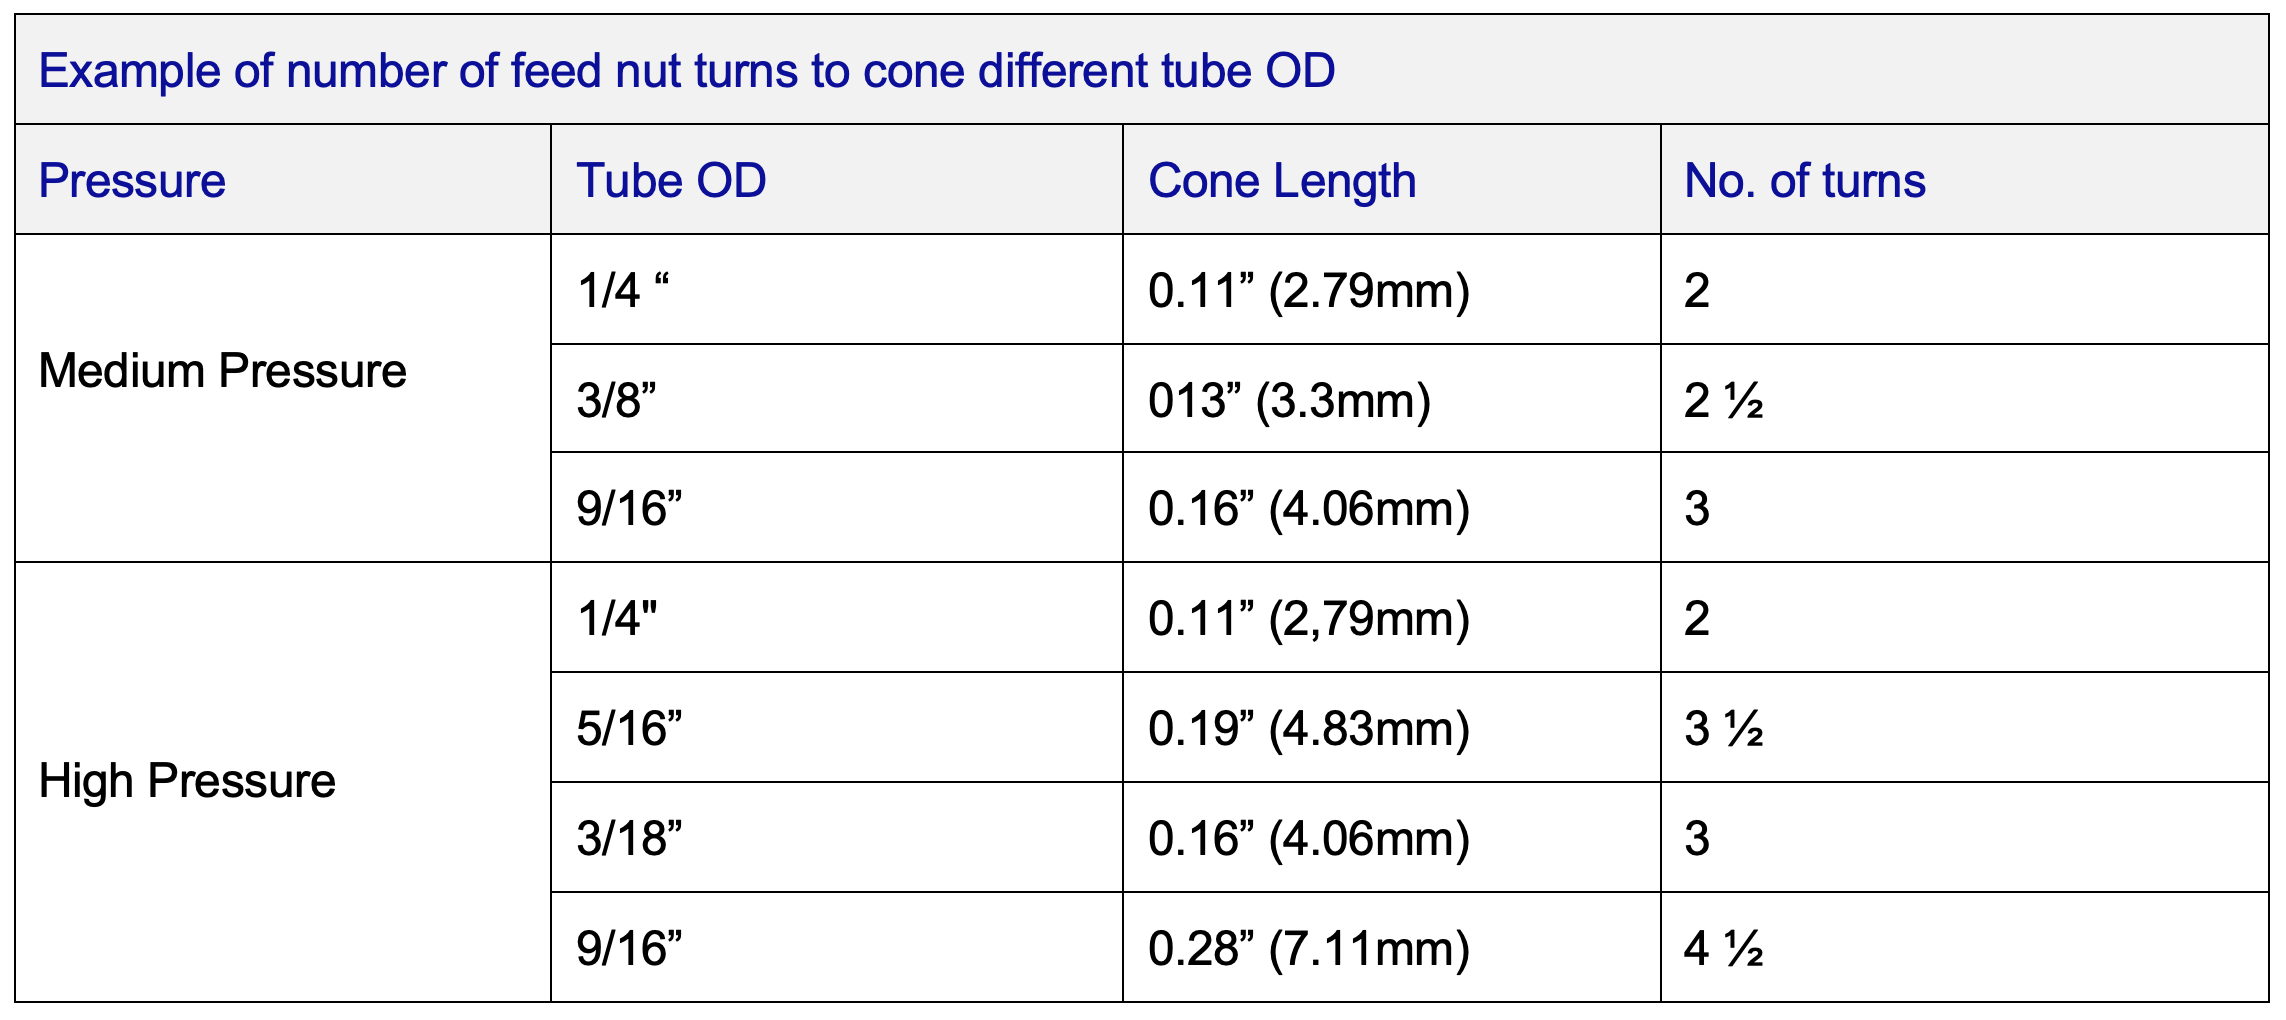
- Install the feed nut/cutter support assembly into the coning tool housing. Rotate the feed nut clockwise until the top of the cutters just contact the top of the tube. Do not rotate the feed nut any further at this point.
- Apply cutting oil through the lubricant opening in the end of the cutter holder or directly through the housing window. Use plenty of cutting oil during the coning operation.
- Rotate the handle in a clockwise direction while simultaneously slowly turning the feed nut in a clockwise direction. Rotate the feed nut slowly and evenly to smoothly cone the tube, if smoke is appearing you are going too fast and/or not using enough cutting oil. Loosen collet nut, remove tubing and visually inspect the cone. Use deburring tool to remove any burr on inside edge of tube after coning.